
How to install led strip light around a corner?
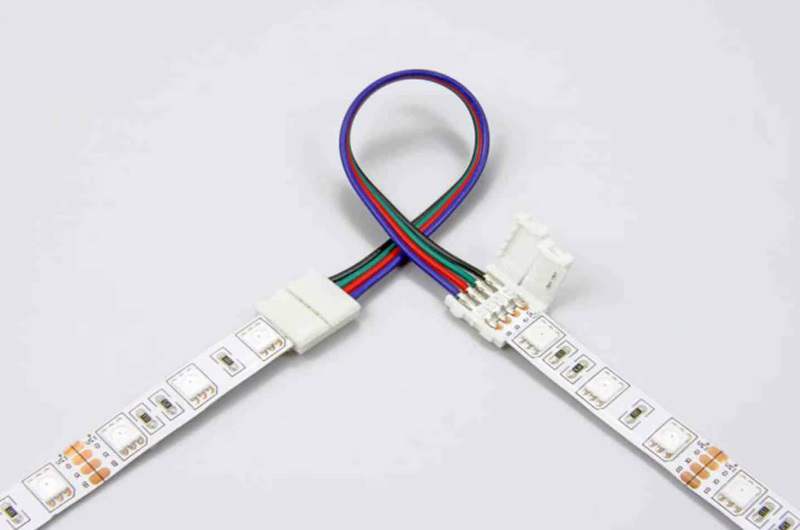
Creating a beautiful lighting display with LED strip lights is a great way to add ambiance and accentuate any space. But when it comes to turning corners, many people find themselves stuck.
Luckily, there’s a couple quick solutions to get your lights dialed in just right.
Way 1: Cut the strip light and connect the strip light with wire

This is a very common way to operate, but it is more difficult for the average consumer because it requires the use of an electric soldering iron to solder the wires to the PCB board.
The specific operation process is as follows:
1. Cut the strip light to a suitable size
2. With a wire and a soldering iron, connect the 2 strips of light. It is recommended that the length of the wire should not be too long.
3. Light up the strip light and make sure the strip can be lit
4. Install the light strip
Way 2: Use L-Shape Connector
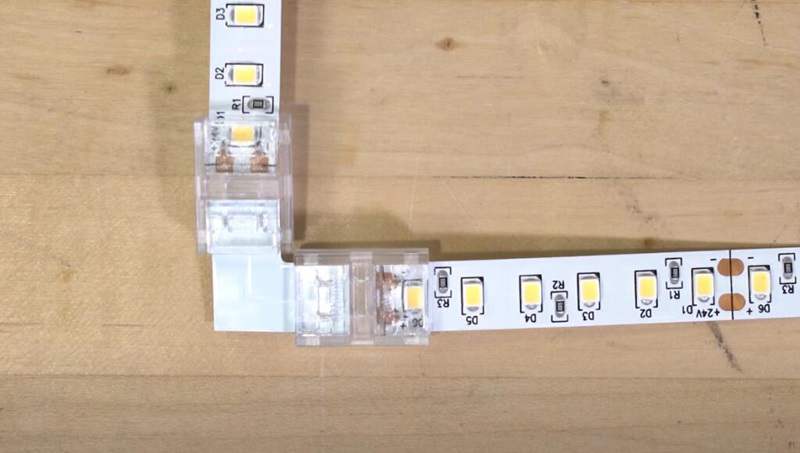
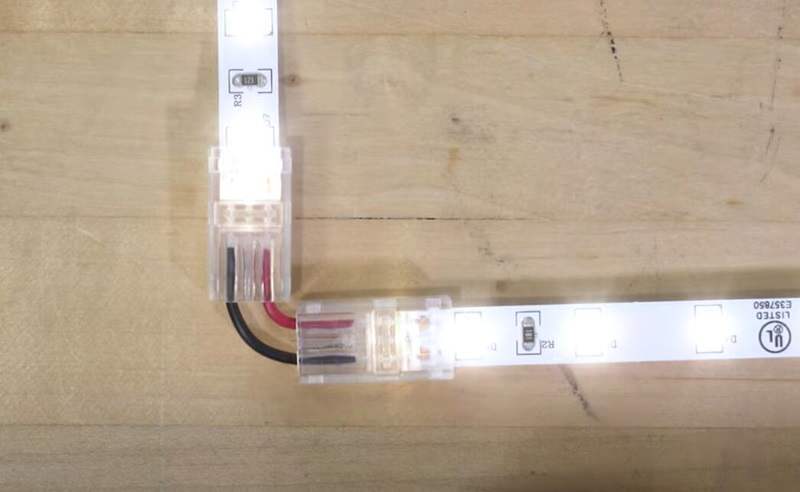
For the cleanest, most seamless corner lighting, L-shape or back-to-back connectors are a superb choice. These small, L-shaped solderless connectors join LED strips at right angles. Compared to bending strips at 90 degrees, connectors provide superior light continuity around corners.
The process is simple:
- Measure and cut LED strips to appropriate length for each side of the corner.
- Attach the connectors to the strip ends, ensuring polarity matches on both sides.
- The strips will now fit snugly around the corner, supported by the connector.
- No need for tapes, glues or risky strip bending.
With L-shape LED connectors properly installed, you’ll enjoy consistent, uniform light wrapping beautifully around corners. The joint is sturdy and leaves no dark spots. For clean, professional corner lighting, L-shape connectors are an elegant solution.
Way 3: The Accordion Fold Method for Gradual Bends
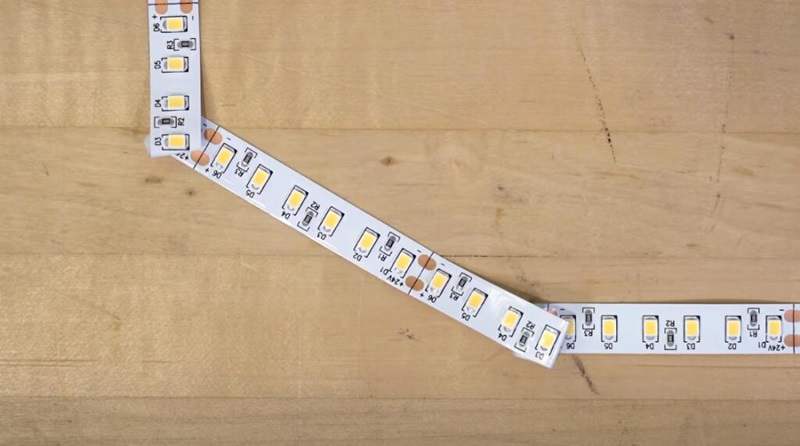
For round corners or angles wider than 90 degrees, the accordion fold technique can create beautiful curved LED strip lighting. By making progressive small folds, you can achieve smooth gradual bends beyond sharp corners.
Here’s how:
- Accordion-fold the LED strip at regular short intervals, like pleats in a fan. Space folds a few inches apart.
- Use strong adhesive to set each fold at the desired angle along the bend. This secures the strip in a curved shape.
- Continue accordion folding and gluing until the full curve is formed by the sequential folds.
With careful accordion folding and adhesive application, you can install LED strips in sweeping curves to accentuate rounded architecture and fixtures. The small folds prevent kinking and maintain strip flexibility around broad bends.
However, please note that bending low-quality LED strips this way can damage the PCB and cause the strips to stop working. Be sure to choose high-quality LED strips.
Way 4: 90 Degree Corner Fold or Ribbon Bend
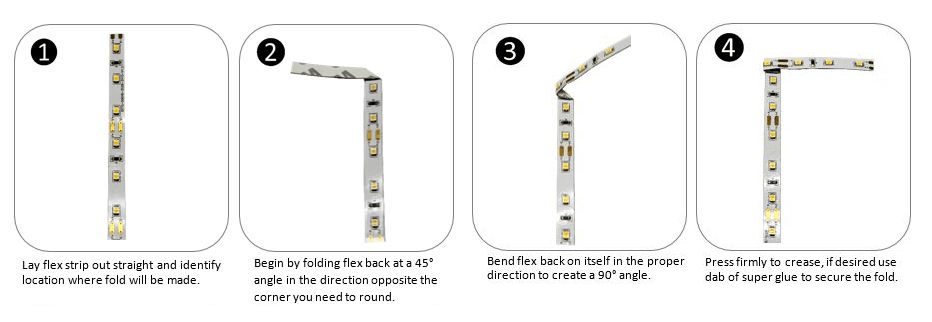
The corner fold, also known as the 90-degree fold, gives a professional approach to your LED strip installment in corners. You will not need any additional tools or cutting hassles for this process. All you need to do is fold the strips at 90 degrees, giving it a neat finish.
The process is as follows:
- Fold one end of the LED strip at a 90-degree angle.
- Lay the folded strip flat, with the fold line parallel to the wall.
- Grip the middle of the fold line with your fingers.
- Gently lift up the fold line so the strip stands vertically.
- Pinch the top end of the fold line with your thumb and index finger, pressing down slightly.
- Then use your index finger to gently glide across the fold line, bending the strip at a 90-degree corner.
- Adjust the fold angle for a clean 90-degree corner installation.
With this simple 90-degree folding method, you can install LED strips around corners professionally and beautifully. No extra tools needed, very convenient and practical.
The ribbon bend, also known as 90-degree pitch, is easier than the corner fold for beginners installing LED strips around a corner for the first time. However, the bending does not affect the lighting quality.
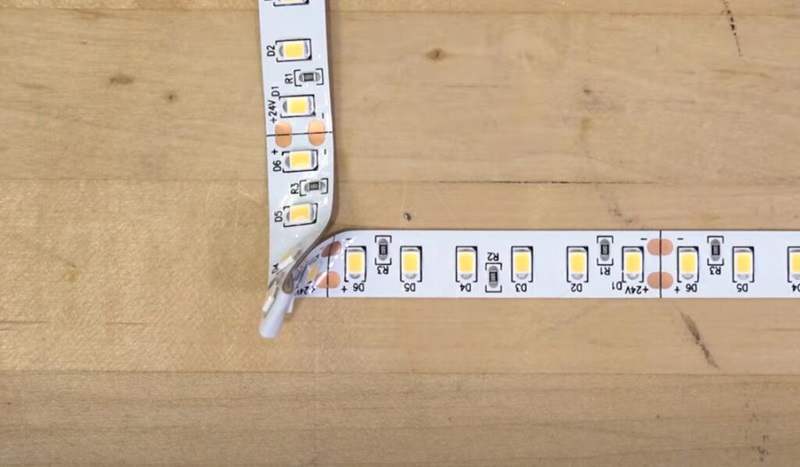
The process of the ribbon bend is as follows:
- Place the LED strip on a flat surface.
- Identify the bending point and twist the strip in a looping style.
- Curl the strip tightly to change direction.
- Use superglue or adhesive tape to attach the looped strip to the surface.
With just these four simple steps, you can use the ribbon bending technique to easily install LED strips around corners. It does not require any special tools or complicated folding. The looping style curl gives a natural 90-degree bend that secures neatly to the corner surface. Though simpler than the corner fold method, the ribbon bend still creates a professional LED strip corner installation without impacting lighting performance.
Way 5: Install and punch a hole and put the light strip into the hole
This is one of the most popular and easiest ways to install. With this method, you only need to add a drill, and you don't need to add additional tools.
The specific installation method is as follows:
- Install the aluminum where you want it
- At the corner, make a hole with an electric drill
- Install the light strip, dig the light strip deep into the hole, and then stretch it out
- Cover with a cover
This method is very convenient and simple, and is suitable for most home decoration. However, it is not suitable in places with thin cabinets or backs.
Way 6: Choose The s shape LED Strip
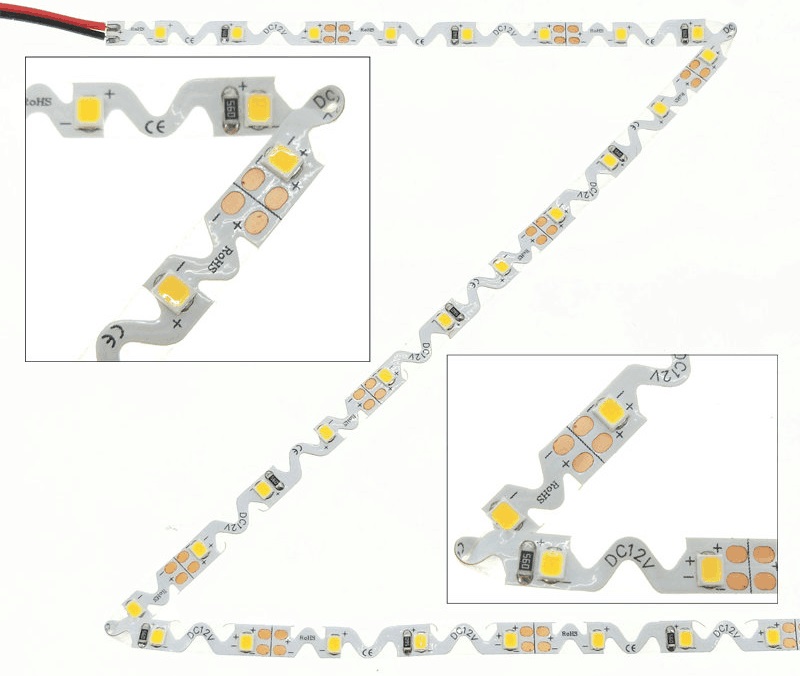
S shape bendable LED strip, also called Zig-Zag LED strip, has excellent anti-bending performance that allows 90-degree maximum angle bending, better than traditional LED strips. S shape bendable LED strip can be curved and formed into shapes, widely used for signage and advertisement applications.
The advantages of S shape bendable LED strips include:
- Can bend 90 degrees for smooth horizontal bends.
- Can curve along irregular surfaces like letters and patterns.
- Strong anti-bending ability for repeated use.
- Allows creative lighting shapes to enhance advertisement appeal.
- Thin design for easy installation.
- Long lifespan.
- Perfectly solves corner installation problems, which is an essential area.
With the S shape bendable design, these LED strips achieve superior anti-bending abilities to flexibly curve into ideal shapes, making them an excellent choice for signage and advertisement identification.
Conclusion
How to install LED strip lights around corners? You don’t have to be stuck anymore! Today, we walked you through 6 ways to get your LED strip lights in those corners.
If you ever find yourself in another dead end or corner with your LED lights, feel free to check out our other discussions. Who knows? We might have the bright idea you need!
How to DIY LED Light Strips for Mirror?
What's the best adhesive tape for led strip?
Related Article

Need an Instant Quote For Your Upcoming Projects?
Send us the details and we will get back to you within 12 hours.