
How to cut connect and install LED Sheet Lights
LED sheet lights are a smart solution for projects that need thin structure, flexible layout, and even illumination. They are widely used for signage backlighting, display cabinets, ceilings, cove lighting, architectural details, and decorative lighting. Compared with traditional LED strips or rigid panels, LED sheets are easier to customize because they can be cut into different shapes and connected into larger illuminated areas. Hanron Lighting also offers several popular LED sheet options for different project needs, including single color, CCT adjustable, RGB, RGBW, and pixel RGBW types.
In this guide, we will use Hanron Lighting’s 5 best-selling LED sheet products as examples: the Single White LED Sheet HR00-B24W392P, the CCT Adjustable LED Sheet HR00-B24TW784P, the RGB LED Sheet HR00-C24RGB288P, the RGBW LED Sheet HR00-C24RGBW50P, and the Pixel RGBW LED Sheet HR00-B24MRGBW800P. These models all use DC24V input, but their cutting units, wiring methods, and controller requirements are different, so it is important to choose the correct way to cut, connect, and install each one.
Five Popular LED Sheet Types
1) Single White LED Sheet HR00-B24W392P

This is a constant-voltage white LED sheet with 392 LEDs per sheet and 1 LED per segment. It is a practical choice for projects that need clean, even white illumination, such as light boxes, display cabinets, and general backlighting. Because the circuit is simple and the cutting unit is small, it is also convenient for custom layouts.
2) CCT Adjustable LED Sheet HR00-B24TW784P

This model uses 784 LEDs per sheet and 2 LEDs per segment, making it suitable for projects that need tunable white lighting from warm to cool. It is a good option for spaces where the lighting atmosphere may need to change, such as retail displays, hospitality projects, and interior decorative lighting. Compared with a standard single white sheet, it offers more flexibility in lighting effect.
3) RGB LED Sheet HR00-C24RGB288P

It uses 288 LEDs per sheet and is designed for color-changing decorative lighting, mood lighting, and display effects. This type of LED sheet is a good fit for projects where visual impact is more important than white functional lighting. It can create a wide range of color effects and is often used in commercial decoration and feature lighting.
4) RGBW LED Sheet HR00-C24RGBW50P

This model combines RGB color with a separate white channel, so it can provide both colorful effects and functional white light. It also has a 1-LED cutting design, which gives it excellent flexibility for custom shapes and detailed layouts. This makes it especially suitable for projects that need both decorative lighting and practical illumination in the same installation.
5) Pixel RGBW LED Sheet HR00-B24MRGBW800P

This is an addressable LED sheet based on the WS2814B IC, designed for dynamic programmable effects such as chasing, flowing, and segmented color control. Unlike standard RGBW sheets, it allows more advanced lighting performance and is suitable for projects that require animated effects and more precise control. It is a strong choice for creative displays, premium decorative lighting, and interactive visual applications.
Tools and Materials You May Need
Before cutting and installing LED sheet lights, it is best to prepare the main tools and accessories in advance. In most projects, you will need basic items such as scissors, a ruler, connectors, wires, and a DC24V constant-voltage power supply. Depending on the LED sheet type, you may also need the right controller, such as a dimmer for single color products, a CCT controller for tunable white models, or an RGB/RGBW/pixel controller for color-changing versions. For custom wiring work, a soldering iron can also be helpful.
Besides the electrical parts, a few simple installation materials can make the work easier and cleaner, such as adhesive tape, mounting clips, and basic surface-cleaning tools. Before starting the project, it is always important to check that the power supply, controller, connectors, and cables are all compatible with the LED sheet you are using. Preparing these items first can help avoid wiring mistakes, save installation time, and make the whole setup more reliable.
How to Cut LED Sheet Lights Safely

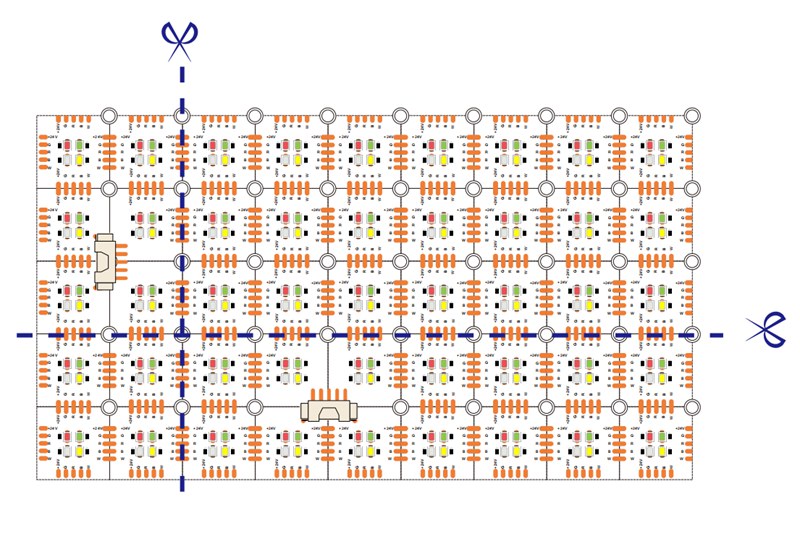
Before cutting any LED sheet, always turn off the power completely. LED sheets should only be cut along the marked cutting lines. Cutting outside the marked area can damage the circuit and cause part of the sheet to stop working. Clean cutting tools are also important, because rough or dull cuts may damage copper pads and make reconnection more difficult.
The basic process is simple. First, measure the installation area. Second, mark the section you need. Third, cut only on the pre-marked line. After cutting, check the copper pads carefully and make sure they are clean and complete before you reconnect the sheet. It is also a good idea to test the cut section before final installation.
Different products have different cutting flexibility. The single white model is 1 LED per segment, the CCT adjustable model is 2 LEDs per segment, the RGB model is 12 LEDs per segment, the RGBW 1-LED-cut model is 1 LED per segment, and the pixel RGBW model must be cut with extra attention to signal direction and continuity. For custom layouts, smaller segment products are usually easier to work with.

How to Connect Different Types of LED Sheet Lights
After cutting, the next step is connection. In most projects, LED sheets can be connected by plug-in connectors or soldered wires. Plug-in connectors are faster and easier for standard installation, while soldered wires are better for permanent projects or custom wiring layouts.
Single Color LED Sheet
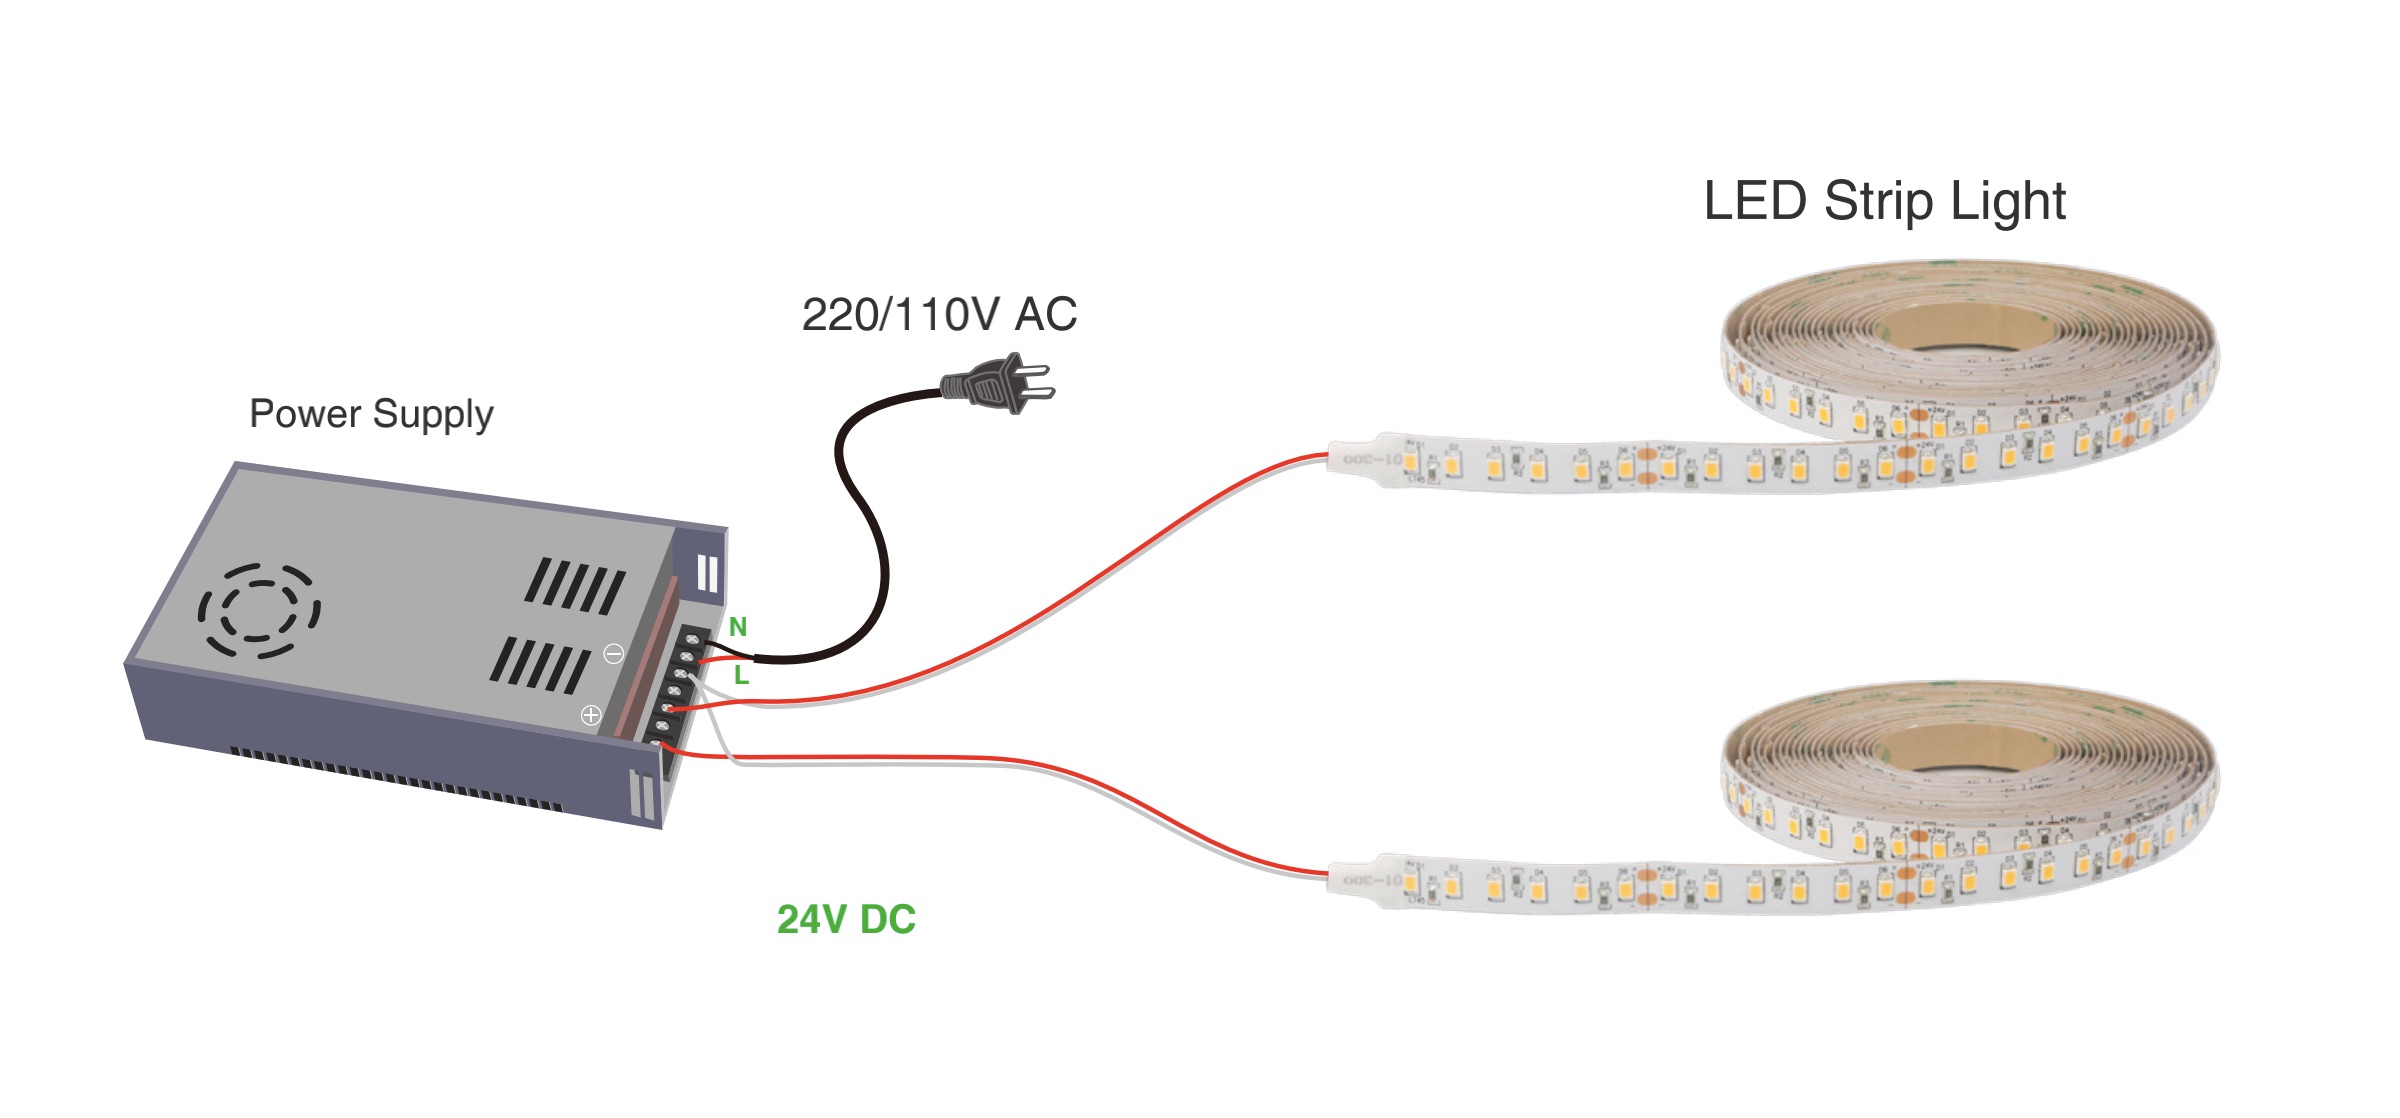
A single color LED sheet is the easiest type to connect. The DC24V power supply connects directly to the positive and negative terminals, and a dimmer can be added if brightness control is needed. This type is simple, stable, and suitable for light boxes, cabinet lighting, and other basic backlighting applications.
Specific connection diagram is shown below:


The key point here is polarity. Make sure positive goes to positive and negative goes to negative. For larger projects, do not overload one power supply or create runs that are too long, because voltage drop can reduce brightness uniformity.
CCT Adjustable LED Sheet
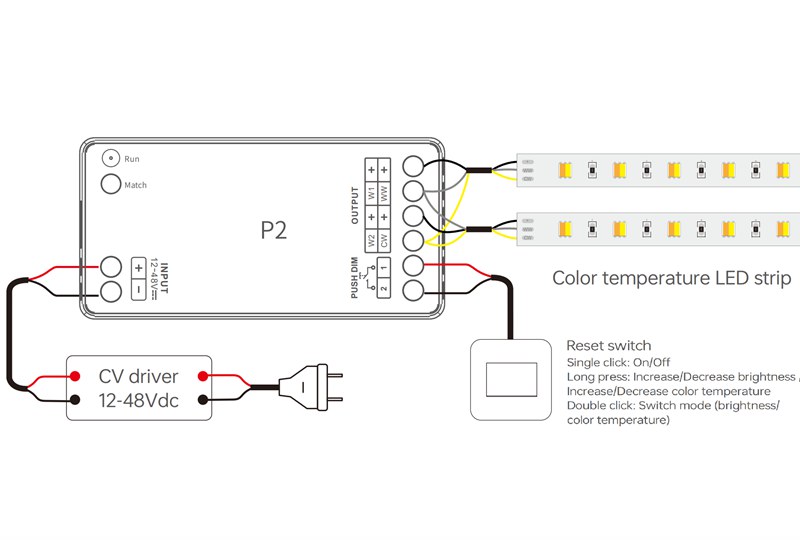
A CCT adjustable LED sheet uses warm and cool white channels, so the wiring is more complex than a single color sheet. This model uses terminals marked + / C / W, and it needs a compatible tunable white controller or dimming system if color temperature adjustment is required.
Specific connection diagram is shown below:


The main thing to watch is channel order. If the warm and cool channels are connected incorrectly, the sheet may still light up, but the color temperature control will not work as expected. It is best to test warm white, cool white, and mixed white output before final installation. Also, one power supply point has a load limit, so large projects should pay attention to power calculation and connection quantity.
RGB LED Sheet
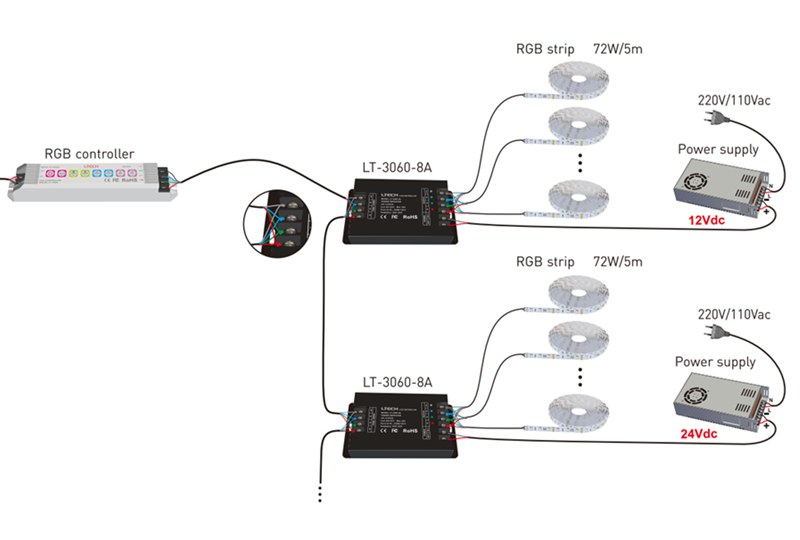
An RGB LED sheet uses separate red, green, and blue channels together with the DC24V common line. It must be connected to a proper RGB controller so that each color channel can be controlled correctly. This type is mainly used for decorative lighting and color-changing effects.
Specific connection diagram is shown below:


The most important point is to match the channel order correctly. If R, G, and B are wired incorrectly, the sheet may still turn on, but the colors will be wrong. In larger installations, it is better to use parallel power distribution instead of one very long connection, because RGB products are more sensitive to voltage drop and color inconsistency.
RGBW LED Sheet
An RGBW LED sheet adds an independent white channel to the standard RGB structure. This makes it more flexible because it can produce both decorative colors and practical white light. The RGBW model HR00-C24RGBW50P is especially useful when installers need fine cutting flexibility, because it uses a 1-LED segment design.
Specific connection diagram is shown below:


The main caution here is controller matching. An RGBW sheet should use an RGBW controller, not a standard RGB controller, otherwise the white channel cannot be controlled correctly. You should also verify that all channels respond normally before final mounting. Since this model supports horizontal and vertical cutting along the panel lines, it is a good option for custom backlighting layouts, but avoid cutting into the components by mistake.
Pixel RGBW LED Sheet
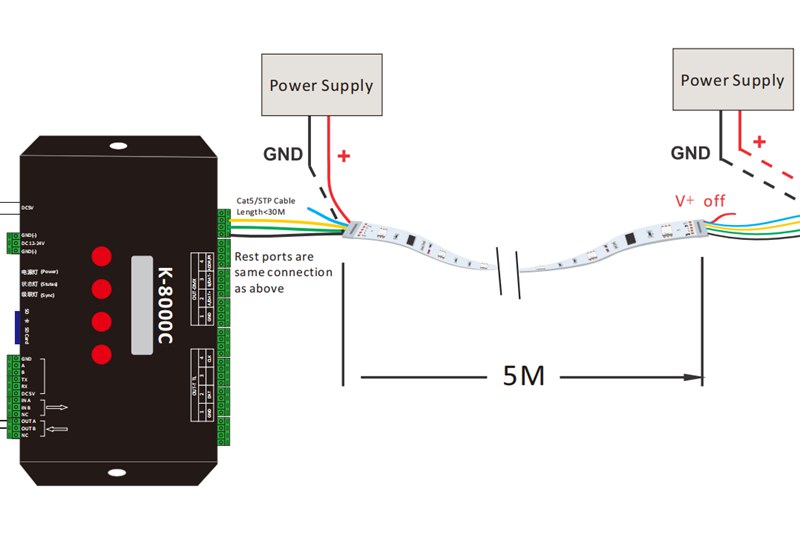
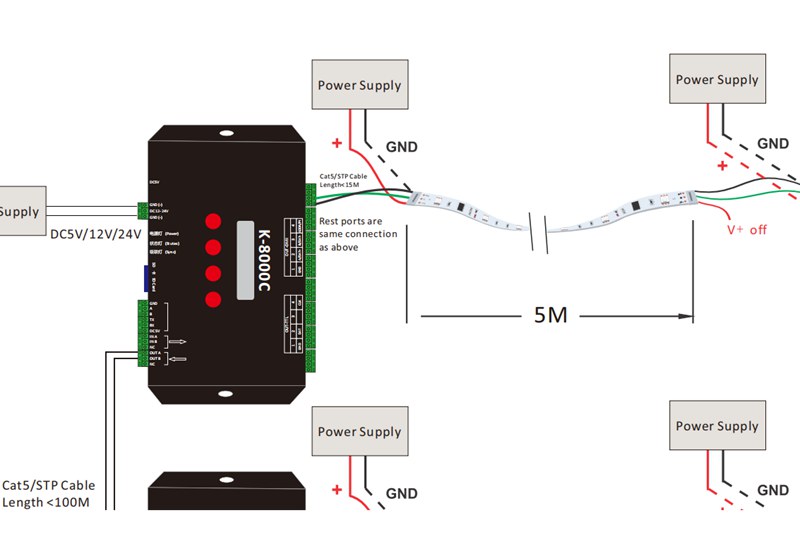
A pixel RGBW LED sheet is the most advanced type in this group. The HR00-B24MRGBW800P uses the WS2814B IC and includes signal-related terminals such as DIN, BIN, DO, BO, GND, and +24V. It must be connected to a compatible pixel controller, not a normal RGBW controller. This type is made for programmable lighting effects.
Specific connection diagram is shown below:

The most important issue with pixel LED sheets is signal direction. If the input and output sides are mixed up, the downstream LEDs may not work correctly. After cutting, signal continuity must also be maintained. This model supports connector-based installation without soldering in some layouts, but after cutting the panels, attention must still be paid to signal transmission direction. In addition, the PH terminal overload current is limited to 5A, so power calculation is very important in large systems.
How to Install LED Sheet Lights
Before final installation, it is best to do a quick mock-up test. Connect the LED sheet, power supply, and controller first, then power it on briefly to make sure everything works normally. This can help you find polarity errors, wrong controller settings, or loose connections before the sheet is fixed in place.
After testing, switch off the power and prepare the mounting surface. The surface should be dry, flat, and clean. Dust, oil, or uneven surfaces can reduce adhesion and affect long-term reliability. Once the surface is ready, position the LED sheet carefully and fix it step by step rather than rushing the whole sheet down at once. After that, complete the final wiring and test the system again before closing the project structure.
During installation, it is also important to leave enough power margin. In general, the total power load should stay within about 80% of the rated power supply capacity. This helps reduce overload risk, overheating, and brightness drop in long runs.
Common Problems and How to Avoid Them
The most common installation mistake is cutting off the marked line or cutting through functional components. The second common problem is wrong polarity or wrong channel order during reconnection. The third is choosing an undersized power supply, which can lead to dim sections, flicker, or unstable performance. These issues are not complicated, but they happen a lot when installers treat all LED sheets as if they were the same product.
Another frequent issue is voltage drop in long runs or large installations. If the brightness becomes weaker at the far end, the system may need better power distribution, shorter connection paths, thicker wires, or sectional powering. This is especially relevant for large backlighting projects or installations that combine several sheets together.
For pixel RGBW sheets, signal direction must be checked carefully. For RGB and RGBW constant-voltage products, the color channels must match correctly. For CCT sheets, warm and cool channels must not be mixed up. And for any sheet type, poor contact on connectors or damaged copper pads after cutting can cause local dark areas. So after every cut and every reconnection, a quick functional test is worth doing before final assembly.
Conclusion
LED sheet lights are easy to customize, but good results depend on choosing the right type and using the right cutting, connection, and installation method. Using Hanron Lighting’s five popular products as examples makes this easier to understand: single white for basic backlighting, CCT adjustable for tunable white projects, RGB for decorative color changing, RGBW for mixed color and white lighting, and pixel RGBW for advanced programmable effects.
As long as you cut on the marked lines, match the wiring correctly, choose the proper controller, and test before final installation, LED sheet lights can deliver clean installation, reliable performance, and excellent lighting results in both commercial and decorative projects.
The Complete Guide to Side-Emitting LED Strip Lights
ETL vs UL for LED Strip Lights
Related Article
Need an Instant Quote For Your Upcoming Projects?
Send us the details and we will get back to you within 12 hours.