
LED Strips on Metal Surfaces: Everything You Need to Know

Lighting can transform any space, and LED strips offer an innovative way to add vibrant, customizable illumination to your home or workspace. But what about installing these versatile lights on metal surfaces? Whether you're looking to highlight sleek metal cabinets, create under-shelf lighting, or add a modern touch to industrial decor, installing LED strips on metal can be a game-changer. The process might seem daunting, but with the right approach, it's simpler than you think. In this comprehensive guide, I'll share everything you need to know to achieve a professional-looking installation. From preparation and adhesive choices to insulation and heat management, I've got you covered. Get ready to light up your metal surfaces like a pro!
Advantages of Installing LED Strips on Metal

Heat conduction properties
One of the primary advantages is metal's excellent heat conduction properties. LEDs, while efficient, still generate some heat during operation. When attached to a metal surface, this heat dissipates more effectively, reducing the risk of overheating. This efficient heat management can extend the lifespan of the LEDs, ensuring they operate at optimal brightness and efficiency for a longer period. Overheating can lead to premature failure of LED components, so the heat-conducting properties of metal provide a practical and beneficial solution.
More pronounced and vibrant lighting effect
Moreover, the reflective nature of metal surfaces can enhance the overall brightness and effectiveness of the LED strips. Metals like aluminum and stainless steel can reflect light, amplifying the illumination produced by the LEDs. This reflection can create a more pronounced and vibrant lighting effect, making the space appear brighter and more dynamic. This is particularly useful in applications where maximum brightness is desired, such as in workspaces, kitchens, or retail displays. The enhanced brightness can also reduce the number of LED strips needed to achieve the desired lighting level, potentially lowering costs.
Durability and stability
Durability and stability are additional advantages of using metal surfaces for LED strip installations. Metal surfaces, unlike some other materials, provide a robust and reliable foundation for the LED strips. This stability ensures that the LED strips remain securely in place over time, even in environments subject to vibrations or movements, such as vehicles or machinery. Metal's durability also means it is less likely to warp, crack, or degrade over time, maintaining the integrity of the installation and protecting the LED strips from damage.
Choosing the Right LED Strips for Metal Surfaces

Selecting the right type of LED strip is essential for achieving the desired effect and ensuring compatibility with the metal surface. Consider factors such as brightness (measured in lumens), color temperature (warm, cool, or neutral), and the strip's flexibility. Waterproof LED strips may be necessary for outdoor or humid environments. Additionally, look for LED strips with strong adhesive backing specifically designed for metal or other non-porous surfaces to ensure a reliable bond.
Here are some popular led strip light:
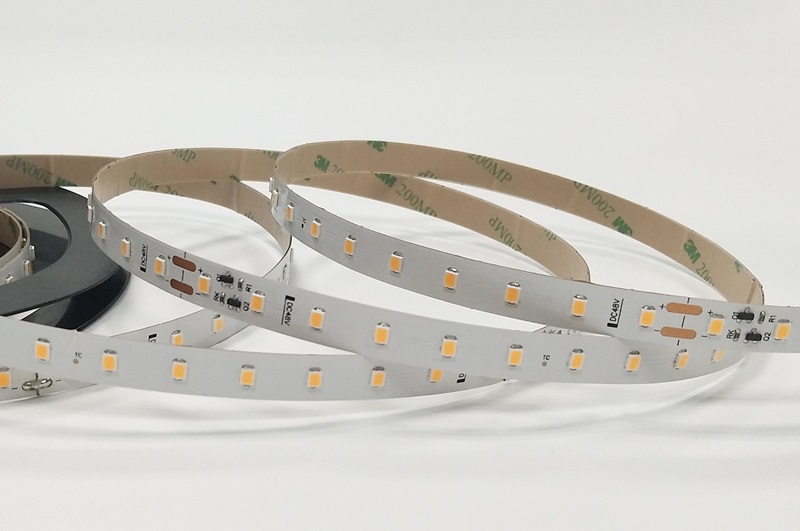
Standard led strip: cob led strip, 2835 led strip, 2216 led strip, 2110 led strip,5050 led strip, 3528 led strip, 3014 led strip, etc.
High light efficiency led strip: 210lm/W led strip, 195lm/W led strip, 180lm/W led strip, 160lm/W led strip, 140lm/W led strip
Colors LED Strip: RGB led strip, RGBW led strip, RGB CCT led strip, etc.
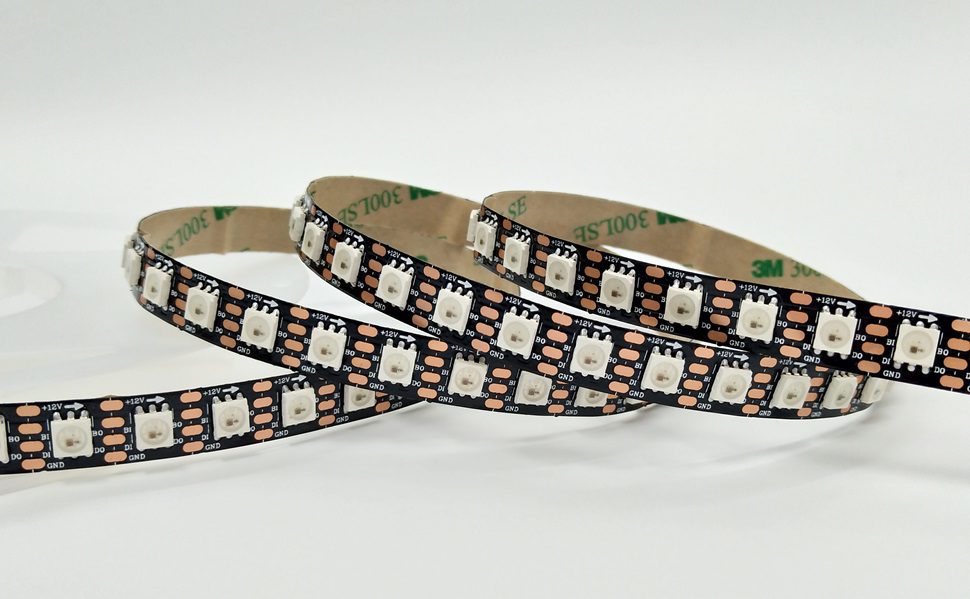
Pixel led strip: individual controlled led strip, External IC led strip, DMX512 led strip, pixel led panel, etc.
LED Neon Light: Top bend led neon light, side bend led neon light, black led neon light, round & half-round led neon light
What Kind of Metal (Aluminum Profile) Should We Choose for LED Strips?
When selecting an aluminum profile for your LED strip installation, it's essential to consider various factors that will affect the performance, aesthetics, and durability of your lighting setup. Here’s a detailed guide on choosing the right aluminum profile for your LED strips:
1. Type of LED Aluminum Profile
Surface-Mounted Profiles:

These profiles are designed to be mounted directly onto surfaces such as walls, ceilings, or under cabinets.
They are ideal for general lighting applications and provide a clean, finished look.
Surface-mounted profiles are easy to install and can be used in various locations.
Recessed Profiles:
Recessed profiles are designed to be embedded into surfaces, creating a seamless and flush finish.
They are perfect for applications where a minimalistic look is desired, such as in flooring, walls, or furniture.
Installation is more complex and may require cutting into surfaces to accommodate the profile.
Corner Profiles:
Corner profiles are specifically designed to fit into 90-degree corners, making them ideal for illuminating edges and corners.
They provide even lighting distribution along the corners and can enhance architectural features.
These profiles are versatile and can be used in both residential and commercial settings.
Flexible Profiles:
Flexible aluminum profiles can bend and conform to curved surfaces, offering versatility in design.
They are suitable for applications where the LED strips need to follow non-linear paths or rounded edges.
These profiles are great for creative and custom lighting projects.

| Cover Type | Description | Advantages | Disadvantages | Best Use Cases |
| Clear Covers | Protect the LED strips while allowing maximum light output. | Maximum brightness, ideal for areas where bright light is crucial. | Can cause glare and harsh lighting. | Task lighting, areas needing high brightness. |
| Frosted Covers | Diffuse the light, creating a softer and more even illumination. | Reduce glare, provide aesthetically pleasing light, create ambient and accent lighting. | Slightly reduce overall brightness compared to clear covers. | Ambient and accent lighting applications. |
| Milky Covers | Offer the highest level of light diffusion for very soft and uniform lighting. | Gentle, diffused light, ideal for creating a cozy and inviting atmosphere. | Reduce overall brightness more than frosted or clear covers. | Living spaces, retail environments, mood lighting. |
3. Size and Compatibility
Profile Width and Height:
Ensure the aluminum profile is wide and deep enough to accommodate the LED strip, including any wiring and connectors.
Profiles with larger dimensions can handle higher wattage strips and provide better heat dissipation.
LED Strip Fit:
Check the specifications of both the LED strip and the aluminum profile to ensure compatibility.
Some profiles are designed for specific widths of LED strips, so it’s crucial to match them accurately.
4. Heat Dissipation
Material Thickness:
Profiles with thicker walls offer better heat dissipation, which can enhance the lifespan and performance of the LED strips.
Higher quality aluminum provides more efficient heat management.
Ventilation:
Some aluminum profiles come with built-in ventilation features to improve airflow and cooling.
Good ventilation is essential, especially for high-power LED strips or installations in confined spaces.
5. Installation Accessories
Mounting Clips and Brackets:

Many aluminum profiles come with mounting clips or brackets for easy installation.
These accessories ensure the profile stays securely in place and can simplify the installation process.
End Caps and Connectors:
End caps provide a finished look and protect the ends of the profile and LED strip.
Connectors allow for seamless transitions between multiple profiles, ensuring a continuous line of light.
Types of Adhesives for Securing LED Strips to Metal
While many LED strips come with adhesive backing, additional adhesives can provide extra security, especially on challenging surfaces.
| Adhesive Type | Usage Scenario | Adhesive Thickness mils (mm) | Adhesion to Stainless Steel (N/CM) | Application |
| 3M 200MP | General bonding for metal, plastic, and wood materials | 5.2 (0.13) | 7.0 N/CM | Indoor |
| 3M 300SLE | High-temperature bonding, automotive and electronics | 4.8 (0.12) | 8.6 N/CM | Indoor |
| 3M 9080 | Low surface energy bonding, plastics, and powder coatings | 12.8 (0.32) | 7.5 N/CM | Indoor |
| 3M VHB 4229 | Structural bonding for metal, glass, and high surface energy plastics, outdoor use | 30.4 (0.76) | 20.0 N/CM | Waterproof LED strips, outdoor use |
| Tesa 4965 | General bonding for metal, plastic, and wood materials | 8.2 (0.2) | 14.0 N/CM | Suitable for profiles with coatings |
| Blue Thermal Adhesive | Thermal adhesive for electronic components and LED strips | 5.2 (0.13) | 6.0 N/CM | Budget LED strips |
Step-by-Step Guide to Installing LED Strips on Metal
Step 1: Measure and Plan
Measure the area where you'll install the LED strips. Mark the spots and ensure the strips will reach the power source. Plan the layout to avoid any issues during installation.
Step 2: Cut the LED Strips
If needed, cut the LED strips to the desired length at the designated cutting points. Be careful to follow the manufacturer's guidelines to avoid damaging the strips.

Step 3: Clean the Metal Surface
Clean the metal surface with a degreaser or rubbing alcohol to remove dirt, dust, oil, or grease. Wipe with a clean cloth and let it dry completely for maximum adhesion.
Step 4: Apply the Adhesive Backing
Peel off the protective layer from the adhesive backing of the LED strip. Press the strip firmly onto the metal surface, smoothing it down to eliminate air bubbles and gaps.
Step 5: Secure with Additional Adhesive or Mounting Clips
For extra security, use additional adhesive like double-sided tape or silicone, or use mounting clips. Place the clips at regular intervals to hold the strip securely in place.
Step 6: Connect to Power Source
Connect the LED strip to the power source as per the manufacturer's instructions. Ensure all connections are secure and correctly aligned to avoid short circuits.
Step 7: Test the Installation
Turn on the power to test the LED strip. Check for any sections not lighting up properly and fix any connection issues. Confirm everything is working before finalizing the installation.
By following these steps, you can easily and securely install LED strips on metal surfaces for effective and beautiful lighting.
FAQs:
1. Do LED strips overheat on metal surfaces?
No, metal surfaces actually help dissipate heat, reducing the risk of overheating and potentially extending the lifespan of the LEDs.
2. How do you prevent short circuits when installing LED strips on metal?
Insulate any exposed wiring or connections using electrical tape or heat shrink tubing. Additionally, use insulating materials like electrical tape or rubber sheets between the LED strip and the metal surface.
3. Can you use LED strips on outdoor metal surfaces?
Yes, you can use waterproof LED strips rated for outdoor use (e.g., IP65 or IP67) on metal surfaces. Ensure the adhesive is also suitable for outdoor conditions.
4. How do you secure LED strips to metal surfaces in challenging conditions?
Use additional adhesives like silicone or mounting clips for extra security. These can ensure the LED strips remain attached even in areas with vibrations or movements.
5. What is the best way to clean metal surfaces before installing LED strips?
Clean metal surfaces with a degreaser or rubbing alcohol to remove dirt, dust, oil, and grease. Wipe the surface with a clean, lint-free cloth and let it dry completely.

6. Can you cut LED strips to fit metal surfaces?
Yes, LED strips can be cut to fit specific areas. Follow the manufacturer's guidelines and cut only at the designated points to avoid damaging the circuitry.
7. How do you test LED strips after installation on metal surfaces?
Turn on the power and check each section of the LED strip to ensure all LEDs are functioning correctly. If any issues arise, check the connections and insulation.
8. Can you bend LED strips to fit around curves on metal surfaces?
Yes, many LED strips are flexible and can bend around curves. However, be mindful of the bend radius to avoid damaging the circuitry. For sharp angles, use connectors designed for corners.
9. How do you ensure even lighting when installing LED strips on metal?
To ensure even lighting, measure and plan the layout carefully. Use diffusers or frosted covers to spread the light evenly, and avoid overlapping strips.
10 What are the safety precautions when installing LED strips on metal?
Ensure all connections are insulated to prevent short circuits, use waterproof strips for outdoor installations, and avoid placing strips near flammable materials. Always follow the manufacturer’s guidelines.
Conclusion
Installing LED strips on metal surfaces opens up a myriad of creative possibilities, enhancing both the aesthetic appeal and functionality of various spaces. By carefully selecting the right LED strips, using appropriate adhesives, and ensuring proper insulation, you can achieve a professional and durable installation. Whether you're highlighting architectural features, adding ambient lighting under shelves, or creating a futuristic look with metal furniture, LED strips can transform your environment in stunning ways. With the reflective properties of metal amplifying the lighting effects, your spaces will look more dynamic and visually appealing. Following the detailed steps and tips outlined in this guide will help you achieve a successful and safe installation, bringing your lighting vision to life.
5050 vs 3528 vs 2835 LED Strips: Which One is Right for You?
LED Strip vs LED Tube Lights: Which Is Better?
Related Article

Need an Instant Quote For Your Upcoming Projects?
Send us the details and we will get back to you within 12 hours.